

There’s something undeniably comforting about the smell of fresh banana bread baking in the oven. Whether it’s for a cozy breakfast, an afternoon snack, or a thoughtful gift, banana bread holds a special place in many kitchens. But, what if you could skip the measuring of leavening agents and streamline the process without compromising flavor or texture? That’s where self-rising flour comes in.
If you’ve ever wondered whether using self-rising flour for banana bread is a good idea, you’re in the right place. This article will walk you through four easy ways to bake banana bread with self rising flour, ensuring you get perfect results every time. Not only will you learn how to use self-rising flour to create delicious banana bread, but you’ll also discover how to make your baking process simpler, faster, and more reliable.
Table of Contents
Why Use Self Rising Flour in Banana Bread?
Before we dive into the four methods for making banana bread with self-rising flour, it’s important to understand why it’s such a game-changer in your baking.
1. Simplifies Your Recipe
Using self-rising flour eliminates the need for extra baking powder or baking soda, which are typically required when baking with all-purpose flour. Self-rising flour already contains these essential leavening agents in the right proportions, meaning all you have to do is measure and mix. It’s perfect for busy bakers or those who want to make their banana bread as easy as possible.
2. Reduces Prep Time
Self-rising flour takes the guesswork out of your ingredients list. There’s no need to measure out additional ingredients like salt, baking powder, or soda. Simply grab your self-rising flour, and you’re good to go. This cuts down on preparation time, so you can enjoy a warm loaf of banana bread in no time.
3. Ensures Consistent Results
Baking is a science, and small deviations can affect the outcome. Self-rising flour provides a consistent texture, rise, and flavor. You won’t have to worry about over or under-mixing your leavening agents. By relying on self-rising flour, you increase the chances of creating a banana bread that rises evenly and has the perfect crumb.
4 Quick Ways to Bake Banana Bread With Self Rising Flour
Now that you understand why self-rising flour is such a fantastic option for baking banana bread, let’s explore four easy methods to achieve the best results. These recipes are all simple and customizable, so you can find the one that best suits your preferences. Let’s get started!
Method 1: Classic Banana Bread with a Moist Texture
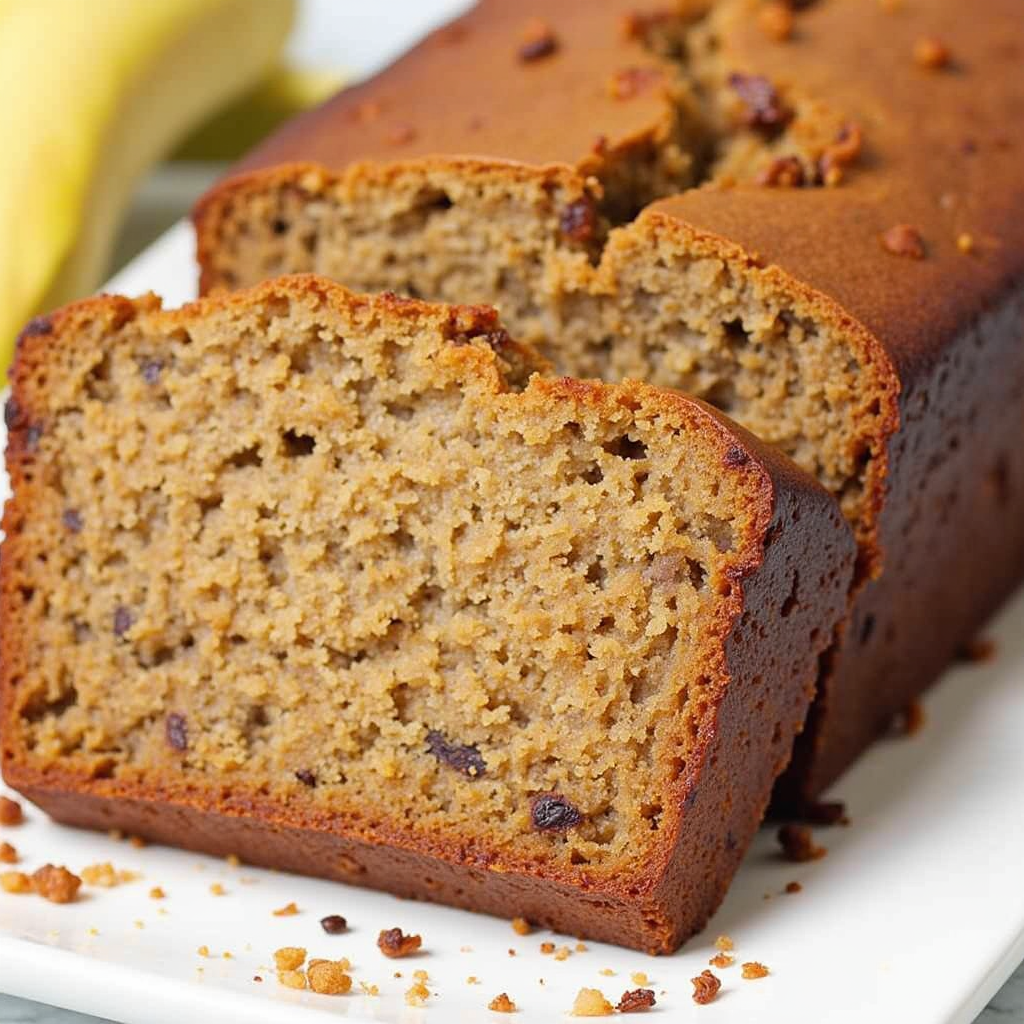
This classic banana bread recipe is ideal if you’re looking for a moist, rich loaf that will delight everyone who takes a bite. Using self-rising flour ensures that the bread rises perfectly, giving you that ideal balance between softness and structure.
Ingredients (Table Format)
| Ingredient | Amount |
|---|---|
| Ripe Bananas | 3-4 medium |
| Self-Rising Flour | 2 cups |
| Butter (melted) | 1/2 cup |
| Granulated Sugar | 1 cup |
| Eggs | 2 large |
| Vanilla Extract | 1 tsp |
Instructions
- Preheat Your Oven
Set your oven to 350°F (175°C). Grease a loaf pan or line it with parchment paper to prevent sticking. - Mash the Bananas
In a large bowl, mash your ripe bananas. The riper the bananas, the better, as they’re sweeter and make the bread more moist. - Mix the Wet Ingredients
Add the melted butter, sugar, eggs, and vanilla extract to the mashed bananas. Stir until everything is combined and smooth. - Add the Self-Rising Flour
Slowly fold the self-rising flour into the wet ingredients. Make sure you don’t overmix; this can lead to a denser loaf. Stir just enough to incorporate. - Bake Your Banana Bread
Pour the batter into the prepared loaf pan and bake for about 60-65 minutes. Check for doneness by inserting a toothpick into the center of the bread. If it comes out clean, it’s done. - Cool and Serve
Let the bread cool in the pan for about 10 minutes before transferring it to a wire rack. Serve it warm for the best experience!
Pro Tip: Want a little extra flair? Add chocolate chips, walnuts, or even a swirl of peanut butter to make your classic banana bread even more delicious!
Method 2: Banana Bread with a Light, Fluffy Texture
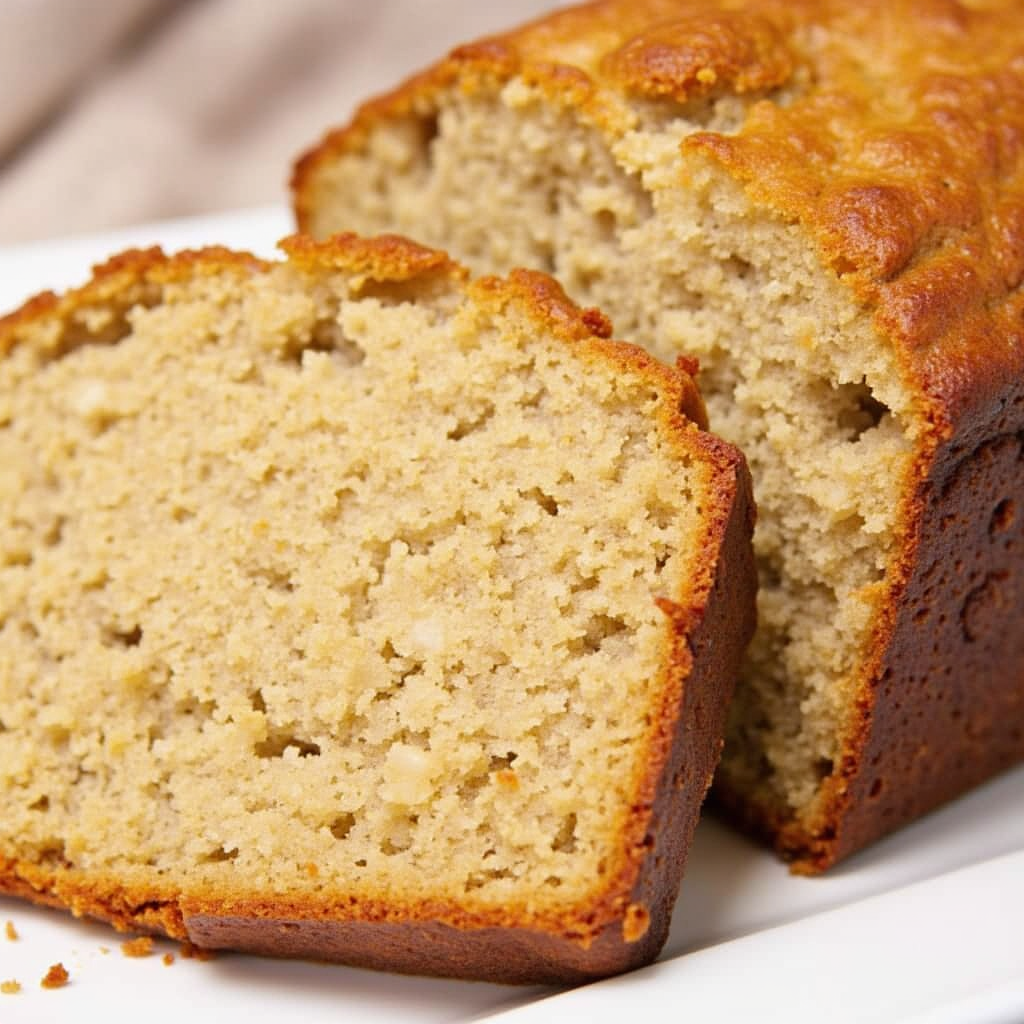
If you prefer a lighter, airier banana bread that almost melts in your mouth, this recipe is for you. It combines the simplicity of self-rising flour with a few tweaks to the ingredients to give you a fluffy loaf every time.
Ingredients (Table Format)
| Ingredient | Amount |
|---|---|
| Ripe Bananas | 3 medium |
| Self-Rising Flour | 2 cups |
| Butter (softened) | 1/3 cup |
| Brown Sugar | 1/2 cup |
| Eggs | 2 large |
| Greek Yogurt | 1/4 cup |
Instructions
- Preheat the Oven
As with the previous method, preheat your oven to 350°F (175°C) and prepare your loaf pan. - Cream the Butter and Sugar
In a separate bowl, cream together the softened butter and brown sugar. Beat until the mixture is light and fluffy. This step helps to create air pockets in the bread, leading to a lighter texture. - Add the Wet Ingredients
Mix in the eggs one at a time, followed by the mashed bananas and Greek yogurt. Greek yogurt helps add a tangy flavor and extra moisture to the bread. - Fold in the Flour
Add the self-rising flour and gently fold it into the batter. Be careful not to overmix. - Bake the Banana Bread
Pour the batter into the prepared pan and bake for 50-55 minutes. Again, use the toothpick test to check for doneness. - Let It Cool
Allow the bread to cool in the pan for 10 minutes before transferring it to a cooling rack. Once it’s cool enough to handle, slice and enjoy!
Pro Tip: For a truly fluffy loaf, sift the self-rising flour before adding it to the batter. This helps to aerate the flour, creating an even lighter texture.
Method 3: Vegan Banana Bread with Self Rising Flour
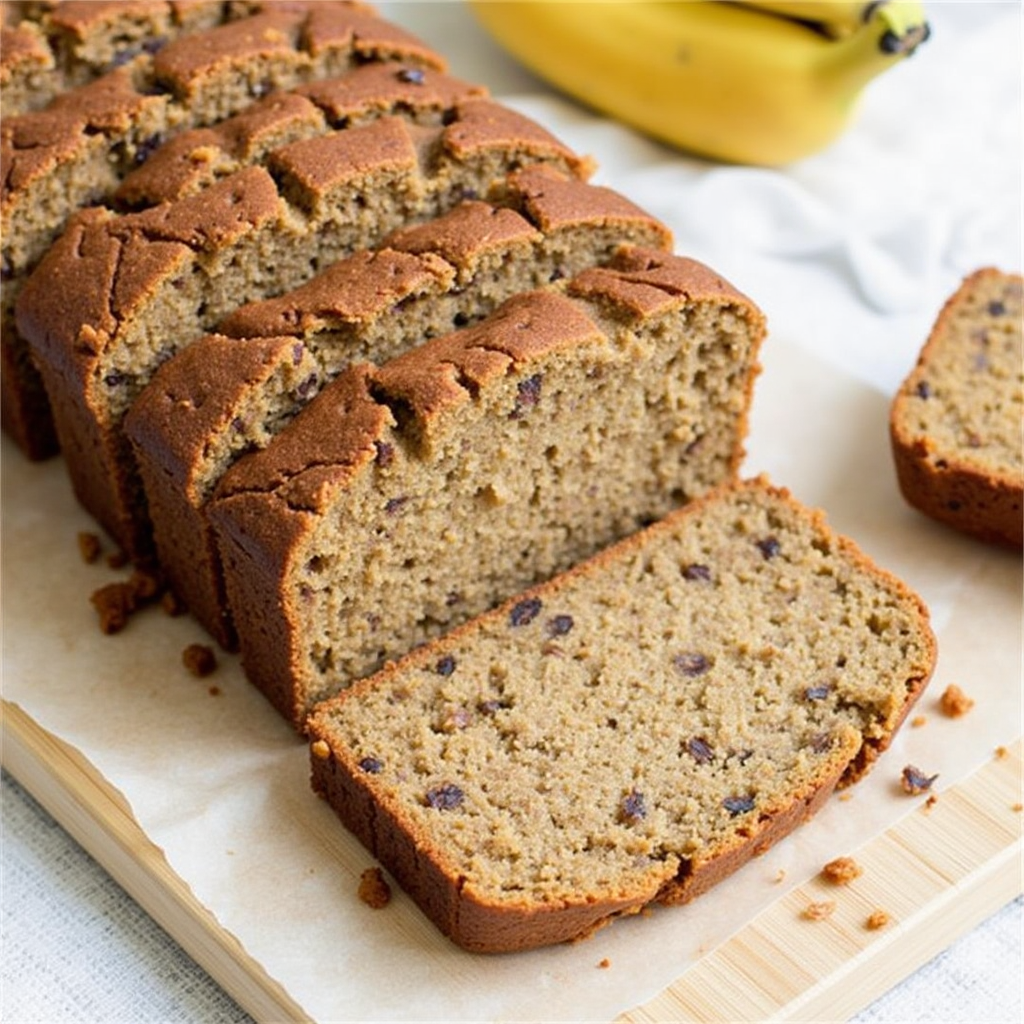
Whether you’re vegan or simply want a dairy-free alternative, this vegan banana bread recipe is the perfect solution. Using self-rising flour means you don’t need to worry about vegan-friendly leavening agents.
Ingredients (Table Format)
| Ingredient | Amount |
|---|---|
| Ripe Bananas | 3 medium |
| Self-Rising Flour | 2 cups |
| Coconut Oil (melted) | 1/3 cup |
| Maple Syrup | 1/4 cup |
| Almond Milk | 1/4 cup |
Instructions
- Preheat the Oven
Preheat your oven to 350°F (175°C) and line a loaf pan with parchment paper. - Mash the Bananas
Mash the ripe bananas in a large bowl, making sure they’re smooth and free of chunks. - Combine the Wet Ingredients
Add the melted coconut oil, maple syrup, and almond milk to the mashed bananas. Stir everything together until smooth. - Mix in the Self-Rising Flour
Gently fold in the self-rising flour. Be sure not to overmix. - Bake the Bread
Pour the batter into the loaf pan and bake for 50 minutes, or until a toothpick comes out clean. - Cool and Serve
Allow the banana bread to cool completely before slicing and serving.
Pro Tip: Add shredded coconut or chopped nuts to the batter for added texture and flavor.
Method 4: Quick Banana Bread Muffins with Self Rising Flour
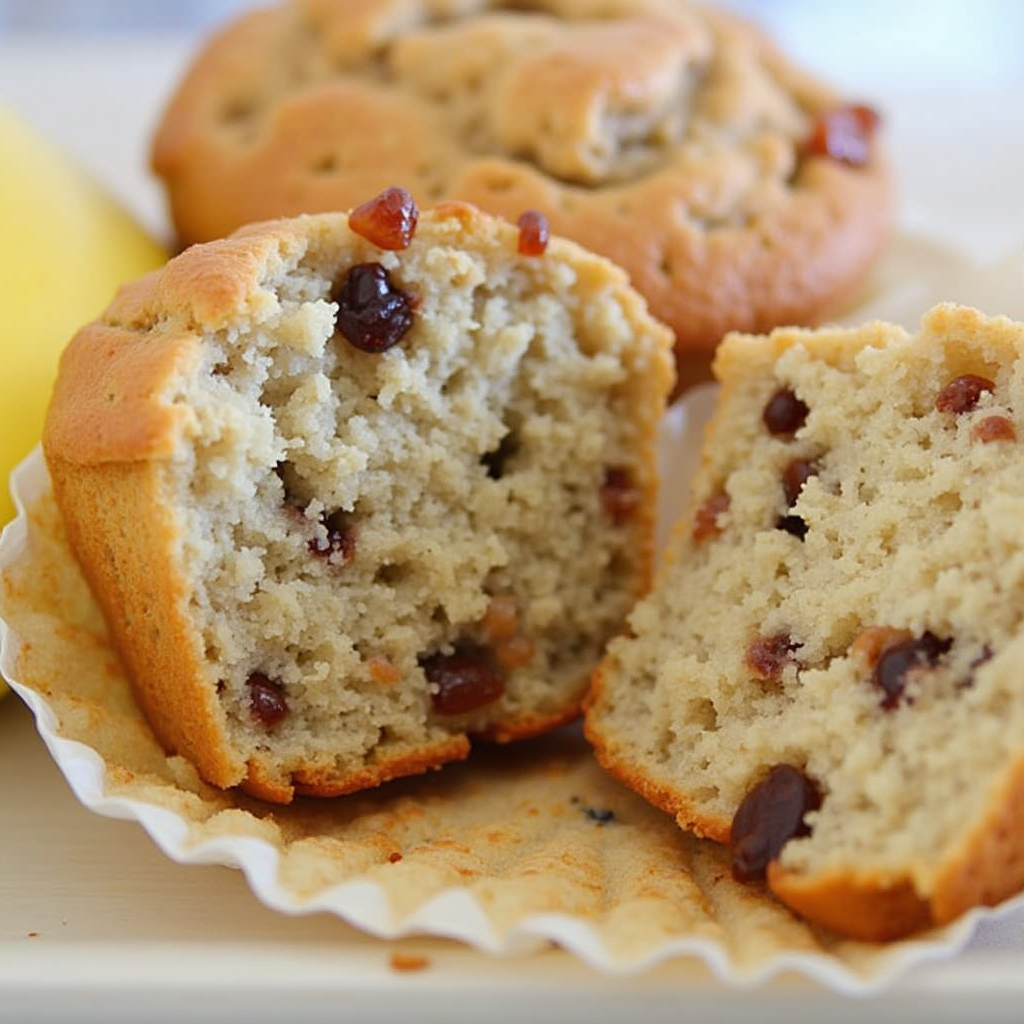
Sometimes, you just want to bake individual servings. These banana bread muffins are not only quicker to bake but also perfect for meal prep or on-the-go snacks.
Ingredients (Table Format)
| Ingredient | Amount |
|---|---|
| Ripe Bananas | 3 medium |
| Self-Rising Flour | 2 cups |
| Butter (melted) | 1/2 cup |
| Granulated Sugar | 1/2 cup |
| Eggs | 2 large |
Instructions
- Preheat Your Oven
Preheat your oven to 375°F (190°C) and line a muffin tray with paper liners. - Prepare the Wet Ingredients
Mash the bananas in a large bowl, then add the melted butter, sugar, and eggs. Mix until well combined. - Add the Flour
Slowly add the self-rising flour to the wet mixture, folding it in gently. - Scoop and Bake
Spoon the batter into the muffin liners, filling each one about two-thirds full. Bake for 18-20 minutes or until golden brown on top. - Cool and Enjoy
Let the muffins cool in the tray for a few minutes, then transfer them to a wire rack.
Pro Tip: You can top each muffin with a sprinkle of cinnamon sugar before baking for an extra touch of sweetness.
Tips for Perfect Banana Bread Every Time
- Use Overripe Bananas: The riper the banana, the better the flavor. Overripe bananas are sweeter and create a more flavorful, moist bread.
- Don’t Overmix the Batter: Stir just until everything is combined. Overmixing can make the bread dense and tough.
- Test for Doneness: Use a toothpick or skewer to check the center of the bread. If it comes out clean, your banana bread is done.
- Cool Properly: Allow your banana bread to cool in the pan for 10 minutes before transferring it to a wire rack. This prevents it from becoming soggy.
Conclusion
Banana bread is a beloved classic, and making it with self-rising flour can simplify your baking process significantly. Whether you prefer a moist, fluffy, vegan, or muffin-style version, there’s a recipe here that’s perfect for you. Self-rising flour provides consistency, reliability, and ease, making it easier than ever to create the perfect loaf of banana bread every time.
So, the next time you have ripe bananas sitting on your countertop, grab a bag of self-rising flour and get baking. Share your creations with friends and family, or keep it all to yourself—either way, you’re sure to enjoy the fruits of your labor. Happy baking!
Have you tried baking banana bread with self-rising flour? Let us know how it turned out in the comments below! And don’t forget to share this article with your fellow baking enthusiasts.